Saturday, April 21, 2012

Braised Cuttlefish

This past holiday season, there was this interesting seafood item at work, that I just couldn't pass up. It was a whole frozen cuttlefish. I had never seen or even heard of this before. I asked one of my culinary teachers about it and he wasn't quite sure about it. Upon further investigating, finding a recipe was a little bit of a task as well. Finally, I found an interesting Greek recipe that sounded kind of good. So I figured, why not. Let's try this and see what happens. To make it more interesting, I made it at my parents' house during the holidays to share in this little culinary endeavor and get other peoples' thoughts.

I found the recipe at http://greekfood.about.com/od/fishentrees/r/soupieskrasates.htm and it's a Greek dish called Soupies Krasates. It's a Braised Cuttlefish Recipe and it was pretty tasty! 

Cuttlefish are cephalopods. They are somewhat similar in taste to octopus and squid. They have 8 arms and 2 tentacles and are highly intelligent. 

Cuttlefish in it's habitat.

Cleaned Cuttlefish.
Me with the Cuttlefish before I cut it up.
All finished. I can assure you that it tastes WAY better than it looks!

In closing, this is a very eccentric dish and I don't expect people to run out and try it. But it's an example of seeing something new and different and not being afraid to try it. I was a little intimidated at first but I am glad that I took on the challenge.


Sunday, April 15, 2012

Meat School

Since I work in the Meat Department, I get all kinds of questions on what kind of meat people should use for different applications. So I thought I would share a couple things with everyone. I will keep sharing more over time, but since we are approaching summer, I will start with grilling. I get asked all the time what steaks are the best for grilling. My answer is always the same. It depends on your preference. My number 1 absolute favorite steak is a Ribeye Delmonico. It's a boneless Rib Steak that has lots of marbling and packed with tons of flavor and juiciness!

Ribeye Delmonico


The best steaks for grilling are Rib Steaks, Strip Steaks, T-Bones, Porterhouse, Filet, and Top Sirloin. If you are watching your calories and fat, and you desire a lean steak, go with either a Filet or Top Sirloin. Both will stay tender even though they are lean. If you went with an Eye of Round or Round Steak, you would be eating shoe leather.

People often wonder what the difference is between T-Bones and Porterhouse. My answer.. Basically nothing. Both cuts are cut from the same sub-primal., the loin. They both are made up of a Strip Steak and a Filet, seperated by a T-Shaped bone. The difference between the two cuts is that as the butcher cuts steaks off, the Filet side gets bigger and the Strip side gets smaller. So Porterhouse has a big Filet, small Strip. The T-Bone has a small to almost no Filet, and a much bigger Strip.

T-Bone, notice the small Filet on the left side of the steak.
Porterhouse, Notice the larger Filet on the bottom of the steak. 

This is just barely scratching the surface of meat. Butchery is a fascinating subject and there is so much to know. If you have any questions or comments, please feel free to ask! 

Next lesson, grading beef.

Saturday, April 7, 2012

Last Minute Easter Ham Idea!

Every time I make a ham, this is what I do! It turns out tasty and makes some great juice to make ham gravy. My mom makes ham gravy and the holiday wouldn't be complete without it!

No matter what size ham, the method is still the same.

You will need:

  • Fully cooked Ham - It can be Boneless, Semi-Boneless, etc.
  • 1 Fresh Pineapple
  • Thick Cut Bacon - I prefer peppered bacon.
  • Brown Sugar
  • Pineapple Juice
  • Toothpicks
Method:
  1. Preheat your oven according to Ham's  package directions.
  2. Peel and Chunk your Pineapple. Set aside.
  3. Place ham in your pan. If it has a flatter side, try and keep it to the top.
  4. Score the top of ham with a knife 1/8" to 1/4" deep in a diamond pattern.
  5. Place Brown Sugar on top and as far down the sides that the sugar will stay on. I put on a nice thick layer.
  6. Take your bacon and drape over brown sugar all over the ham.
  7. Take your cubes of Pineapple and stab them with toothpicks and stick into ham. This will secure the bacon down and hold the layer of brown sugar onto the ham. 
  8. Pour Pineapple Juice into bottom of pan. You want enough Pineapple Juice in the bottom of your pan so it doesn't go dry.
  9. Cover your ham and cook according to package directions.
Note: If you want to add a little more brown sugar on top of the bacon, you can. I sometimes do. 

Most of the time, the bacon gets picked off before the ham is even eaten! It is almost like candied bacon!

This is right before ham goes in the oven!


Thursday, April 5, 2012

Boozy Chicken and Cauliflower Pizza Crust

I haven't been able to cook anything new up for you guys to try but I did make an AWESOME chicken dish today! I found a recipe for Boozy Chicken that has mushrooms, almonds, and an Amaretto Glaze. This is where I found the link: http://shabbottshabits.com/2011/boozy-chicken/. It was super tasty. The only thing I did different was add extra mushrooms. So if you want something different and delicious, take a look at that one. Sadly, I do not have a picture of this one. It didn't last long enough!

Another recipe I have tried, was a pizza crust made out of Cauliflower! Interesting and very good! Great if you are watching carbs. Check that out here: http://www.eat-drink-smile.com/2011/04/cauliflower-crust-pizza.html. Definitely a fork and knife kind of pizza.

I topped mine with Turkey Pepperoni, Prosciutto, and Mushrooms!


Both of these blogs have some great recipes so give them a look and enjoy!

Friday, March 30, 2012

Prosciutto Wrapped Asparagus

This is one of my favorite ways to eat Asparagus. I made this in class for my final practical in lab and my teacher liked it as well as my classmates. My wife and I made this last night so I can show you how to prepare it. The Neufchatel Cheese gives it a creamy and tangy taste. It will leave you wanting more!

Prosciutto Wrapped Asparagus
Makes 8


Ingredients

  • 1 lb. Fresh Asparagus 
  • 8 oz. Neufchatel Cheese at Room Temperature (Found right next to the Cream Cheese)
  • 8 Slices of Prosciutto (I buy mine at the Deli and have them slice it fresh for me. You can get it a little thicker which will make spreading the cheese easier.
  • Olive oil for drizzling
  • Black Pepper
Note: I had a little extra asparagus left over, so we ate it. You could get more Prosciutto and probably get a couple more out of it. One way to see how much Prosciutto you need, just count the asparagus at the store and divide by 3 or 4. I only used a half a block of cheese so you won't need more.

Directions
     1.  Preheat oven to 450.
     2.  Wash the asparagus and trim off bottom ends about an inch.
An easy way to know where to trim is by bending it and see where it snaps. 
     3.  In a large pot, bring some water to a boil. You will need enough to cover the asparagus. When water comes to a rolling boil, add asparagus and cook for 3 minutes. You want them just starting to get tender. They will cook in the oven a little longer. Pull them out of the water, rinse with cold water, and drain on paper towel or in colander.

     4.  Lay out the Prosciutto and spread Neufchatel over it.
Be careful not to tear the Prosciutto. The cheese will ooze out if you do.
     5.  Place 3 or 4 Asparagus Spears on a slight angle on top of the cheese.
Start out toward top of spear on an angle.

Roll all the way to the end.

     6.  Drizzle a little Olive oil on your baking sheet so they don't stick, then place your wrapped asparagus on it. Drizzle some more Olive Oil over the asparagus and add just a little black pepper.

      7.  Place in oven and bake for 10 minutes.
You want to bake it just until the Prosciutto starts to crisp up and the cheese is just about to ooze out. 

Done and ready to serve

We had ours as a side with my Smoked Gouda Chicken Cordon Bleu.


For my next Blog post, I will give you the recipe for my Smoked Gouda Chicken Cordon Bleu! So keep your eyes peeled! And as always, let me know what you think.


Monday, March 26, 2012

Cheesy Pesto Orzo with Mushrooms, Tomatoes, and Zucchini

I had such a taste for Pesto, and while at work the other night, saw a jar on sale. So I bought it and couldn't figure out what I wanted. Tonight for dinner, I tried out the new Fresh Takes by Kraft. I will review that in another post. I wanted to create a side dish to go along with it. Here's what I came up with.

Cheesy Pesto Orzo with Mushrooms, Tomato, Zucchini.


Serves 8


Ingredients

  • 1 Tbs Olive Oil
  • 1 Small Onion
  • 1 Clove Garlic
  • 1 Small Zucchini
  • 4 oz. White Mushrooms
  • 14.5 oz. Can Petite Diced Tomatoes
  • 8 oz. Orzo Pasta
  • Splash White Wine
  • 1 Cup Italian Blend Shredded Cheese
  • Pinch Salt and Pepper
  • 4 oz. Basil Pesto
Directions
  1. Bring water to boil in a Medium Pot. Add Orzo. Cook to package directions. Drain.
  2. Small dice the Zucchini and Mushrooms and set aside.
  3. Place Saute Pan over Medium heat. Add Olive Oil.
  4. Finely dice Onion and add to pan. 
  5. While onion is sauteing, mince garlic and add to pan. Be careful not to burn garlic.
  6. Add Mushrooms, Zucchini, and Splash of White Wine.
  7. Saute until tender.
  8. Add can of Petite Diced Tomatoes and bring to simmer. 
  9. Add cooked Orzo to mixture.
  10. Add Pesto and Cheese. Mix until incorporated.
Notes
  • I like to add a Tablespoon or 2 of Pasta water while bringing to simmer. 
  • You can add more or less of the vegetables.
  • You can add more or less of the Pesto and Cheese, depending on your preference.
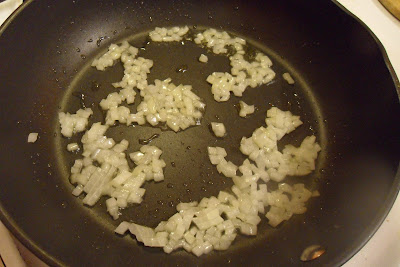
Added the onion

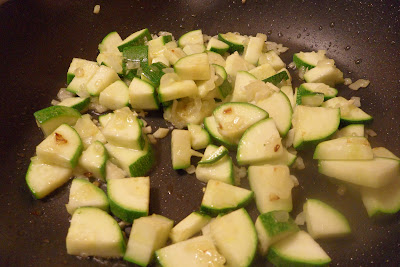
Added Zucchini and garlic

Added Mushrooms and wine

Added tomatoes and pasta water

Added Orzo and Pesto

Final product topped with cheese

You could probably make this a main dish by added cooked chicken. It turned out pretty good for making this up on a whim. Let me know if you like this! Check out all my other recipes.


Sunday, March 25, 2012

Jason's "I'll Change Your Mind" Brussels Sprouts

My wife never used to like Brussels Sprouts. I made them for her once and she went nuts over them. So I thought I'd share my recipe.

My first question is this. Do you like cabbage? Then how can you not like Brussels Sprouts? Most people try the frozen ones and then decide they don't like them. Here's some advice DON'T buy the frozen ones. Then aren't that good. Buy fresh ones! They are like sweet mini cabbages. I simmer them in Chicken Stock and then sautee them in butter and season them. Here's how I will change your mind about Brussels Sprouts:

Ingredients

  • 1 lb. Fresh Brussels Sprouts
  • Water (Enough to cover your Brussels Sprouts)
  • Chicken Bouillon Granules or Soup Base
  • 1 Tbls. Butter
  • Salt, Pepper, Garlic Powder, and Onion Powder
Directions
  1. Put water in your Saucepan or Saute Pan and place over high heat. You'll want just enough water to cover the Brussels Sprouts.
  2. Trim your Brussels Sprouts by cutting off the stem portion with paring knife. Remove any discolored or damaged leaves.
  3. When water comes to boil, add chicken bouillon. The amount depends on how much water you used. (I usually use about 4 Cups of Water and about 2 Tbls. of Chicken Soup Base. You can also just use Chicken Stock.)
  4. Add the Brussels Sprouts to the water and reduce heat to a simmer. 
  5. Simmer for about 15-20 minutes or until just tender. (I usually take one out and cut it in half with a knife. You can tell when they are tender by cutting into them. If they aren't, throw the halves back in a wait a couple more minutes.)
  6. Drain and add back to pan. Add Butter and turn heat to medium. Dust with Salt, Pepper, Garlic Powder, and Onion Powder to taste. Don't add too much salt, as the Chicken Stock or Boullon has salt. You can always add more when eating.
  7. Toss them around to coat in the butter and to disperse seasoning. Saute for a 1-2 minutes.
  8. Enjoy! Congratulations, you now LOVE Brussels Sprouts!
Fresh Brussels Sprouts

Trimming the stem end

Cleaned and ready for cooking

Adding the soup base to the water

Getting ready to saute them

Tossing them in the butter and seasoning

Finished Brussels Sprouts
These are my favorite way to prepare Brussels Sprouts. If you prepare them this way, let me know what you think! Any feedback is gladly accepted! See you next time! Feel free to Share on Pinterest!